


Baking a light and fluffy cake at home does not have to be complicated. With a few basic ingredients, the right technique, and a little patience, you can create a soft and delicious cake that works beautifully for birthdays, afternoon tea, family gatherings, or a simple homemade dessert. One popular example is biskvitas, a traditional-style sponge cake known for its airy texture and delicate crumb. This guide explains how to prepare biskvitas at home, from choosing ingredients to serving the finished cake.
What Is Biskvitas?
Biskvitas is a simple sponge cake that relies on properly whipped eggs to create its characteristic light and airy texture. Unlike richer cakes that depend heavily on butter or oil, this type of cake can achieve impressive volume through the incorporation of air into the eggs. The result is a soft, springy cake that can be enjoyed on its own or used as a base for layered desserts.
The simplicity of biskvitas makes it especially appealing to home bakers. Flour, eggs, sugar, and a few optional flavoring ingredients are usually enough to create a satisfying cake. Because the recipe contains relatively few components, preparation techniques have a major influence on the final result.
Ingredients You Will Need
For a basic biskvitas, you need only a handful of ingredients. Fresh eggs are particularly important because they provide structure and volume. Granulated sugar adds sweetness while also helping stabilize the whipped eggs. Plain or all-purpose flour provides the framework for the cake.
You can also add vanilla extract, lemon zest, or another mild flavoring to give the cake additional character. Some recipes use a small amount of baking powder, although traditional sponge-making techniques can obtain much of the cake’s rise from whipped eggs.
Before starting, measure every ingredient carefully. Baking is more precise than many other types of cooking, and incorrect proportions can affect the texture.
Preparing the Batter
The most important part of making biskvitas is preparing a well-aerated batter. Begin by bringing the eggs to room temperature if possible. Room-temperature eggs generally whip more effectively than very cold eggs.
Place the eggs in a clean, dry mixing bowl and begin beating them. Gradually add the sugar while continuing to whisk. The mixture should become pale, thick, and noticeably larger in volume. Depending on the equipment you use, this process can take several minutes.
When the egg mixture is ready, add any vanilla or citrus flavoring. Sift the flour before incorporating it. Sifting removes lumps and makes it easier to combine the flour with the delicate egg mixture.
How to Fold the Flour Correctly
Folding is another important step in achieving a light biskvitas. Avoid stirring the flour aggressively because doing so can remove the air that was carefully incorporated into the eggs.
Add the sifted flour in small portions. Use a spatula to gently fold the flour into the egg mixture with slow movements. Scrape around the sides and underneath the batter, bringing the mixture upward and over itself.
Continue only until the flour has been incorporated. A few gentle movements are better than prolonged mixing. The finished batter should look smooth and airy rather than dense.
Choosing and Preparing the Cake Pan
The correct pan can make baking easier. A round cake pan is a common choice for biskvitas, particularly if you plan to create a layered cake later. Grease the pan according to your recipe, and consider placing parchment paper on the bottom to make removing the cake easier.
Avoid filling the pan excessively. The batter needs room to expand as it bakes. A properly prepared pan also helps the cake rise evenly and reduces the chance of sticking.
Preheat your oven before placing the cake inside. A stable baking temperature is essential because sudden temperature changes can affect the cake’s structure.
Baking Biskvitas
Pour the batter gently into the prepared pan and place it in the preheated oven. Try not to open the oven door repeatedly during the early stages of baking. A sudden drop in temperature can cause a delicate sponge cake to lose volume.
The exact baking time depends on the size and depth of the pan and the characteristics of your oven. Watch for a lightly golden surface and a cake that springs back gently when touched.
You can also insert a wooden toothpick or cake tester into the center. If it comes out clean or with only a few moist crumbs, the cake is generally ready.
Once baked, remove the pan carefully and allow the cake to cool. Letting it cool sufficiently makes it easier to cut without damaging the delicate crumb.
Common Mistakes to Avoid
Several simple mistakes can turn a potentially fluffy cake into a dense one. The first is under-whipping the eggs. If the eggs and sugar have not gained enough volume, the cake may not develop the desired airy structure.
Overmixing after adding the flour is another common problem. Excessive mixing can deflate the batter and may also develop too much gluten, resulting in a heavier texture.
Incorrect oven temperature can also cause problems. An oven that is too hot may brown the outside before the center has finished cooking, while an oven that is too cool can leave the cake dense or underbaked.
Finally, cutting the cake while it is still very hot can cause crumbling. Allow it to cool before slicing or decorating.
Ways to Serve Biskvitas
One of the advantages of biskvitas is its versatility. You can serve simple slices with tea or coffee, or transform the sponge into a more elaborate dessert.
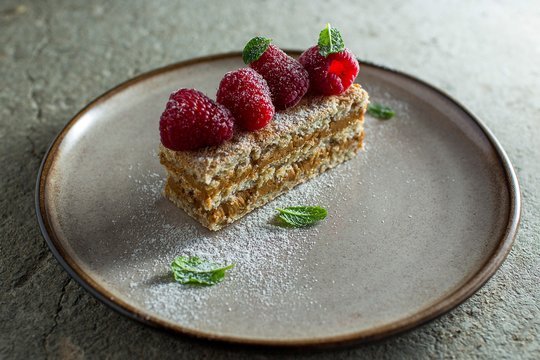
Fresh berries and lightly sweetened whipped cream make an excellent combination. You can also spread the cake with fruit preserves, pastry cream, chocolate cream, or a thin layer of frosting. For a celebration, slice the sponge horizontally and add filling between the layers.
A dusting of powdered sugar is another easy option. It adds sweetness and gives the finished cake an attractive appearance without requiring complicated decoration.
Tips for a Consistently Fluffy Cake
For reliable results, start with clean mixing equipment. Even small amounts of grease can interfere with egg whipping. Measure ingredients accurately and avoid rushing the preparation process.
Sifting flour and folding it gently are especially valuable techniques. Keep the oven door closed during most of the baking period, and allow the finished cake to cool naturally.
If your first biskvitas is not perfect, do not be discouraged. Sponge cakes can require practice because small differences in mixing, oven temperature, and ingredient measurements can change the final texture. Each attempt provides useful experience.
Storing Homemade Biskvitas
A plain sponge cake can usually be stored in an airtight container at room temperature for a short period. Keeping it covered helps prevent the cake from drying out. If the cake contains cream, custard, or another perishable filling, refrigeration is generally necessary.
For longer storage, an unfrosted sponge can be wrapped carefully and frozen. Thaw it gradually before decorating or serving. Proper storage helps preserve the soft texture and prevents unnecessary moisture loss.
Final Thoughts
Making biskvitas at home is a rewarding introduction to sponge-cake baking. Although the ingredient list is simple, careful preparation makes a major difference. Whipping the eggs thoroughly, folding the flour gently, maintaining the correct oven temperature, and allowing the cake to cool properly are the key steps toward achieving a light and fluffy result.
Once you become comfortable with the basic method, you can experiment with vanilla, citrus zest, fruit fillings, cream, or chocolate-based decorations. The versatility of biskvitas means that the same simple sponge can become an everyday treat or the foundation of an impressive celebration cake.